

Add Planner Events
Create Class Events
Class Events improve the way teachers use SLS for in-class lessons by allowing them to attach SLS resources and assignments to events in the Planner. This will help students quickly access their learning materials and easily toggle between SLS and physical resources in class.
Creating a New Event
-
There are three ways to add a New Event:
-
Click + New Event from the Planner page,
-
Click + New Event from the Planner tab within a Class Group,
-
Scroll to your desired time on the Planner and click at the time slot to create a new event at that time.
-
-
When adding a new event from the Planner page, select which Planner should the new event be created for. You can do so from the Planner dropdown list.
Note: When a new event is added from the Planner tab within a Class Group, the new event created will be for the selected Class Group.
-
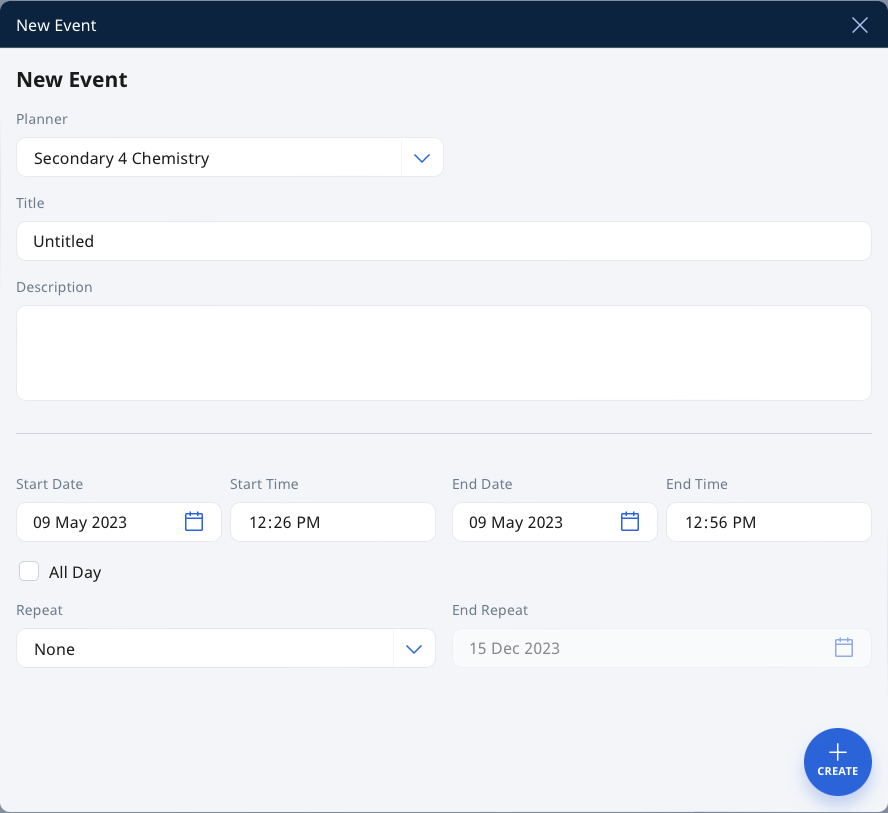
On the New Event subpage, fill in the following details:
-
Planner Click the dropdown list to select which planner you wish to create the New Event for. By default, the Personal Planner will be selected.
When creating a new event from the Planner tab within a Class Group, the Class Group Planner will be default Planner.
-
Title - The event title will be pre-filled for you as “Untitled”. Change the Title to one that is concise and relevant.
-
Description - You can include details of the event here.
-
Date & Time - You can select how often the event repeats, and the end date for the repeat.
-
Note: The End Repeat field will be greyed out if None or Custom are chosen for Repeat.
-
Repeat - You can select how often the event repeats.
-
Note: The End Repeat box will be greyed out if None or Custom are chosen for Repeat.
-
-
Click Create to proceed.
-
For a Class Group Event, clicking the View Planner icon will redirect you to the Planner tab within the Class Group.
Video Tutorial
The “Lessons” in My Drive mentioned in the video have been relabelled to “Modules”.