

Manage My Drive
Create New Folders
Create a New Folder in My Modules Tab
-
Open the left menu from the header on the homepage. Click Resources, followed by My Drive. By default, you will be in the My Modules tab.
-
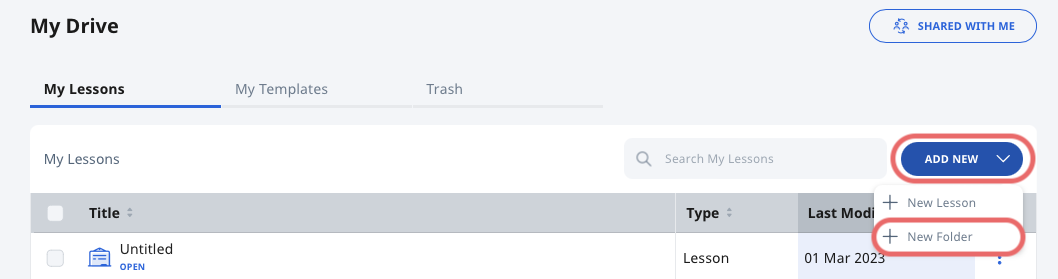
On the My Modules tab, click Create/Edit, followed by New Folder.
-
In the Add New Folder subpage, enter a Folder Name.
-
Click Add New Folder once done.
-
You can create sub-folders in folders by following the above steps.
Folders in Multiple Levels
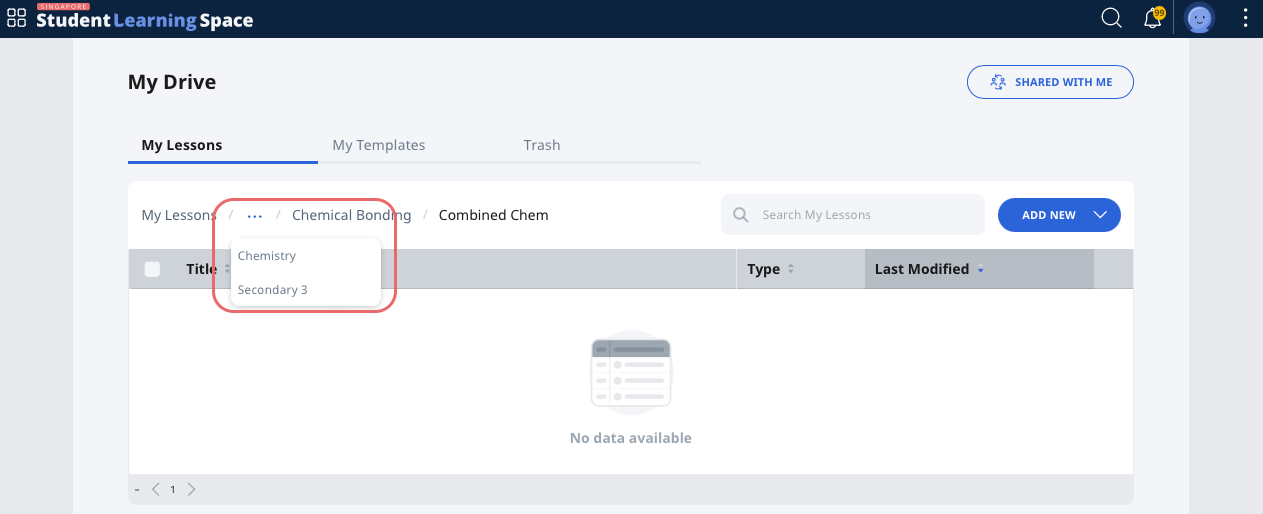
When browsing a folder under My Modules tab, you will see the names of the folders by levels in the horizontal line of text in the table header (breadcrumb). Clicking the folder's title in the breadcrumb will bring you directly to the folder.
If there are too many folder levels, clicking "..." will bring up a dropdown list of all the levels in between.
Did You Know:
By default, the resources in My Drive are sorted by folders, followed by files, based on the latest modified date.
Manage Folders
Move Modules to a Folder
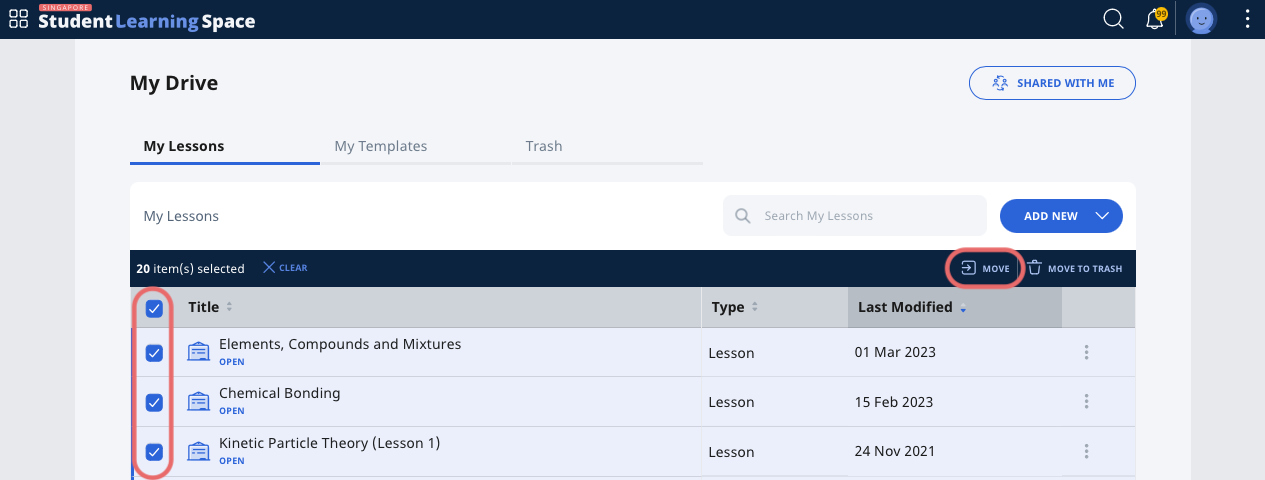
You can move an existing Module from one folder to another.
-
To move an existing Module into a folder, you can click the Overflow (3-dot icon) and select Move. You can also select the Module using the checkboxes on the left and then click Move. You may move two or more Modules in one go.
-
In the Move Module subpage, select the folder to move the Module to. You can also create a New Folder within My Modules folder from this subpage.
-
Click Move.
Rename a Folder
-
In the listing, locate a folder and click the Overflow (3-dot icon), followed by Rename.
-
In the Rename Folder subpage, enter a new title.
-
Click Rename to save the new name.
Delete a Folder
-
In the listing, locate a folder and click the Overflow (3-dot icon), followed by Move to Trash. Alternatively, you can select multiple folders using the checkboxes on the left and click Move to Trash in the table header.
-
If you have deleted a folder by mistake, it can be restored from the Trash tab.
Copy Modules within My Drive
You can make a copy of an existing Module under My Modules tab.
-
To make a copy of an existing Resource, click the Overflow (3-dot icon) and click Make a Copy.
-
In the Make a copy of a Module subpage, select the folder to copy the Module to. By default, the My Modules folder is chosen for you. You can also create a New Folder within My Modules folder if necessary.
-
Click Copy.
Delete Resources
Resources (Modules and Folders) found under My Modules tab can be deleted if you no longer need them.
Move Resources to Trash
-
Open the left menu from the header on the homepage. Click Resources, followed by My Drive. By default, you will be in the My Modules tab.
-
In the listing, click the Overflow (3-dot icon) followed by Move to Trash.
-
To move multiple Resources to trash at once, select the checkboxes beside the Resource Title. Click Move to Trash through the header.
-
You may also click Move to Trash after opening up a Module. From the Module View page, open the right menu and select Move to Trash.
-
To restore a Resource that was deleted by accident, click Restore from the Trash tab.
Delete Resources Permanently
You can choose to permanently delete Resources from the Trash tab.
-
To delete a resource permanently, click the Overflow (3-dot icon) and select Delete Forever.
-
Click OK in the confirmation prompt.
-
To delete multiple Resources at once, select the checkboxes beside the Resource Title. Click Delete Forever through the header.
Restore Resources from Trash
Resources found under the Trash tab can be restored to their original locations.
-
To restore a resource, click the Overflow (3-dot icon) and select Restore.
-
To restore multiple Resources at once, select the checkboxes beside the Resource Title. Click Restore through the header.
-
Restored Resources will appear under My Modules tab.